One and a Half M5 Jobs
My 2002 M5 needed some relatively minor work recently. The car is old enough to be graduating from college this year, so it’s no surprise things are breaking. I tackled these at home rather than a club DIY event and I was partially successful.
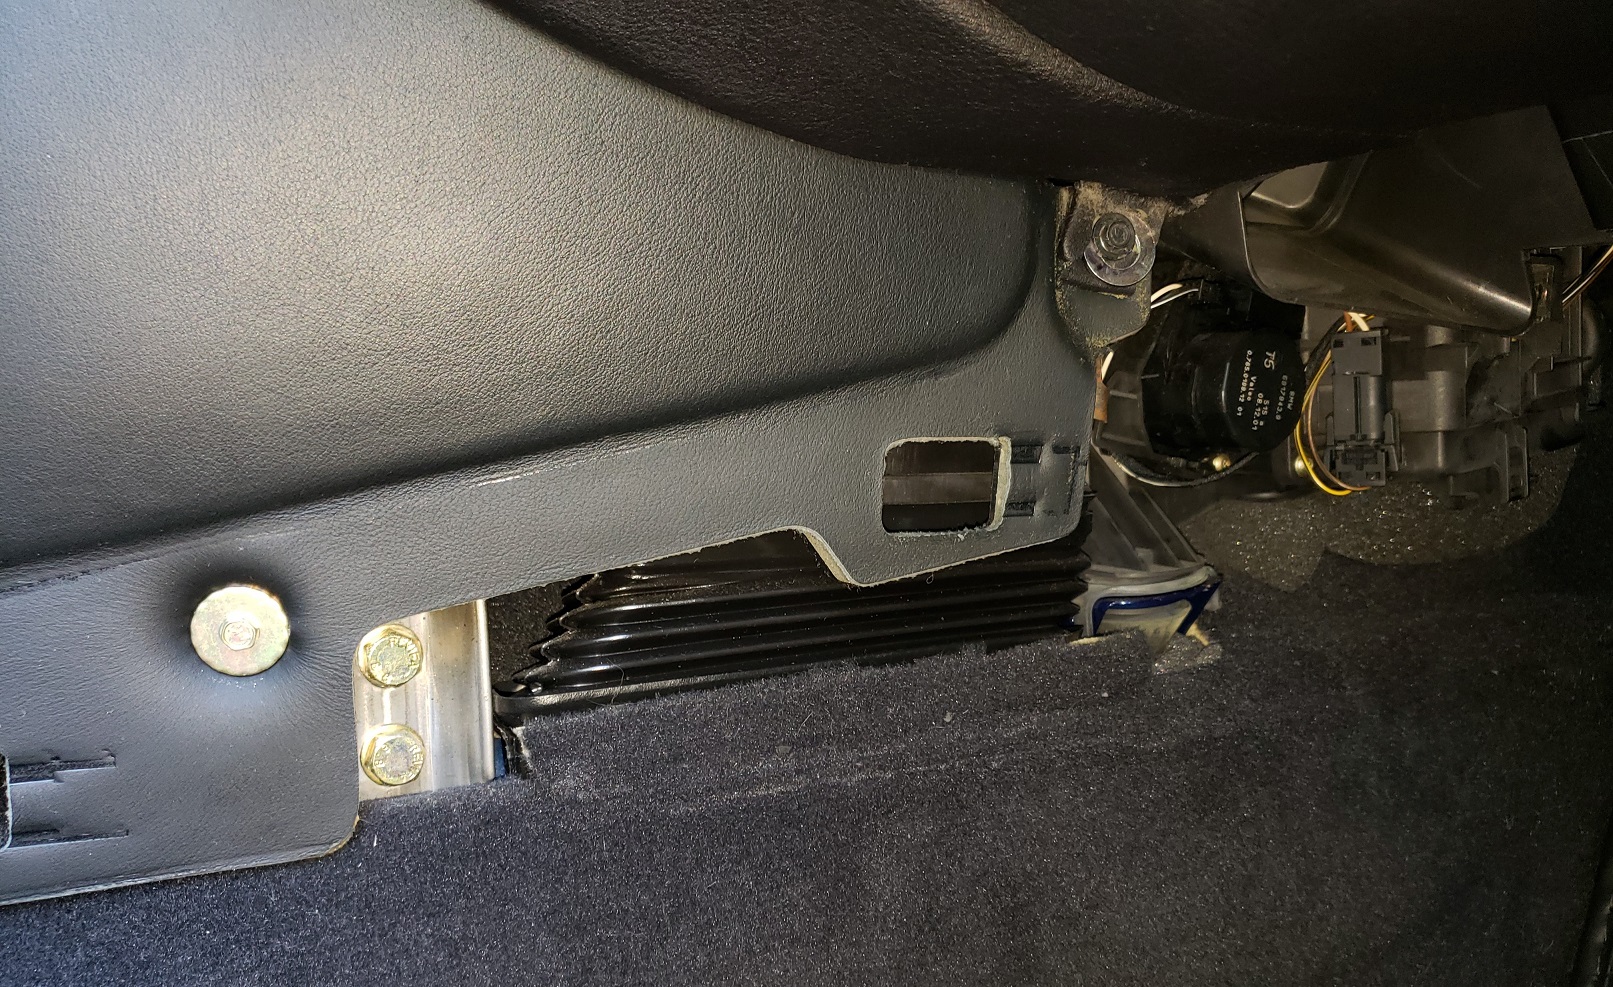
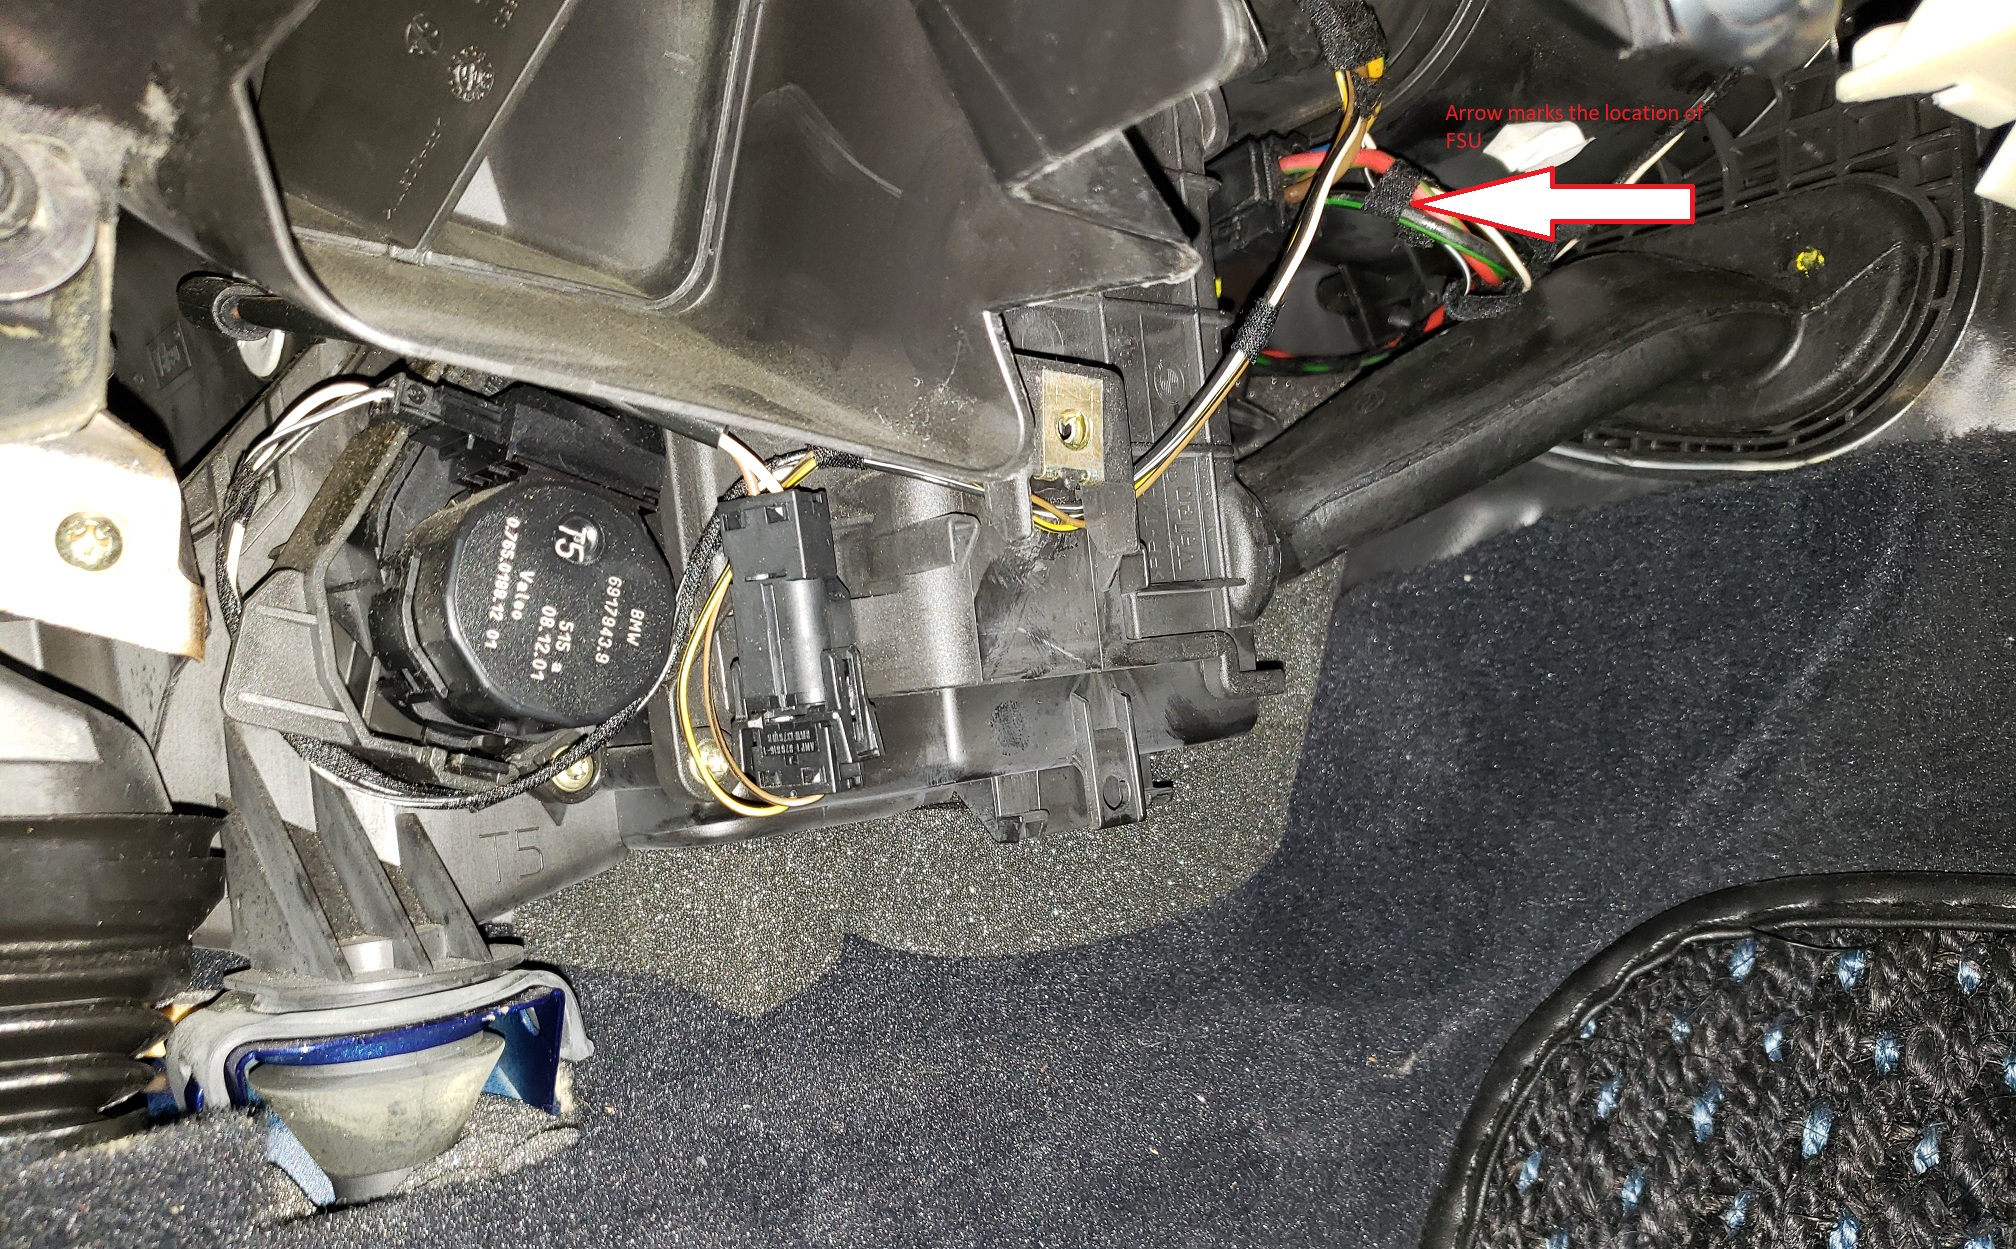
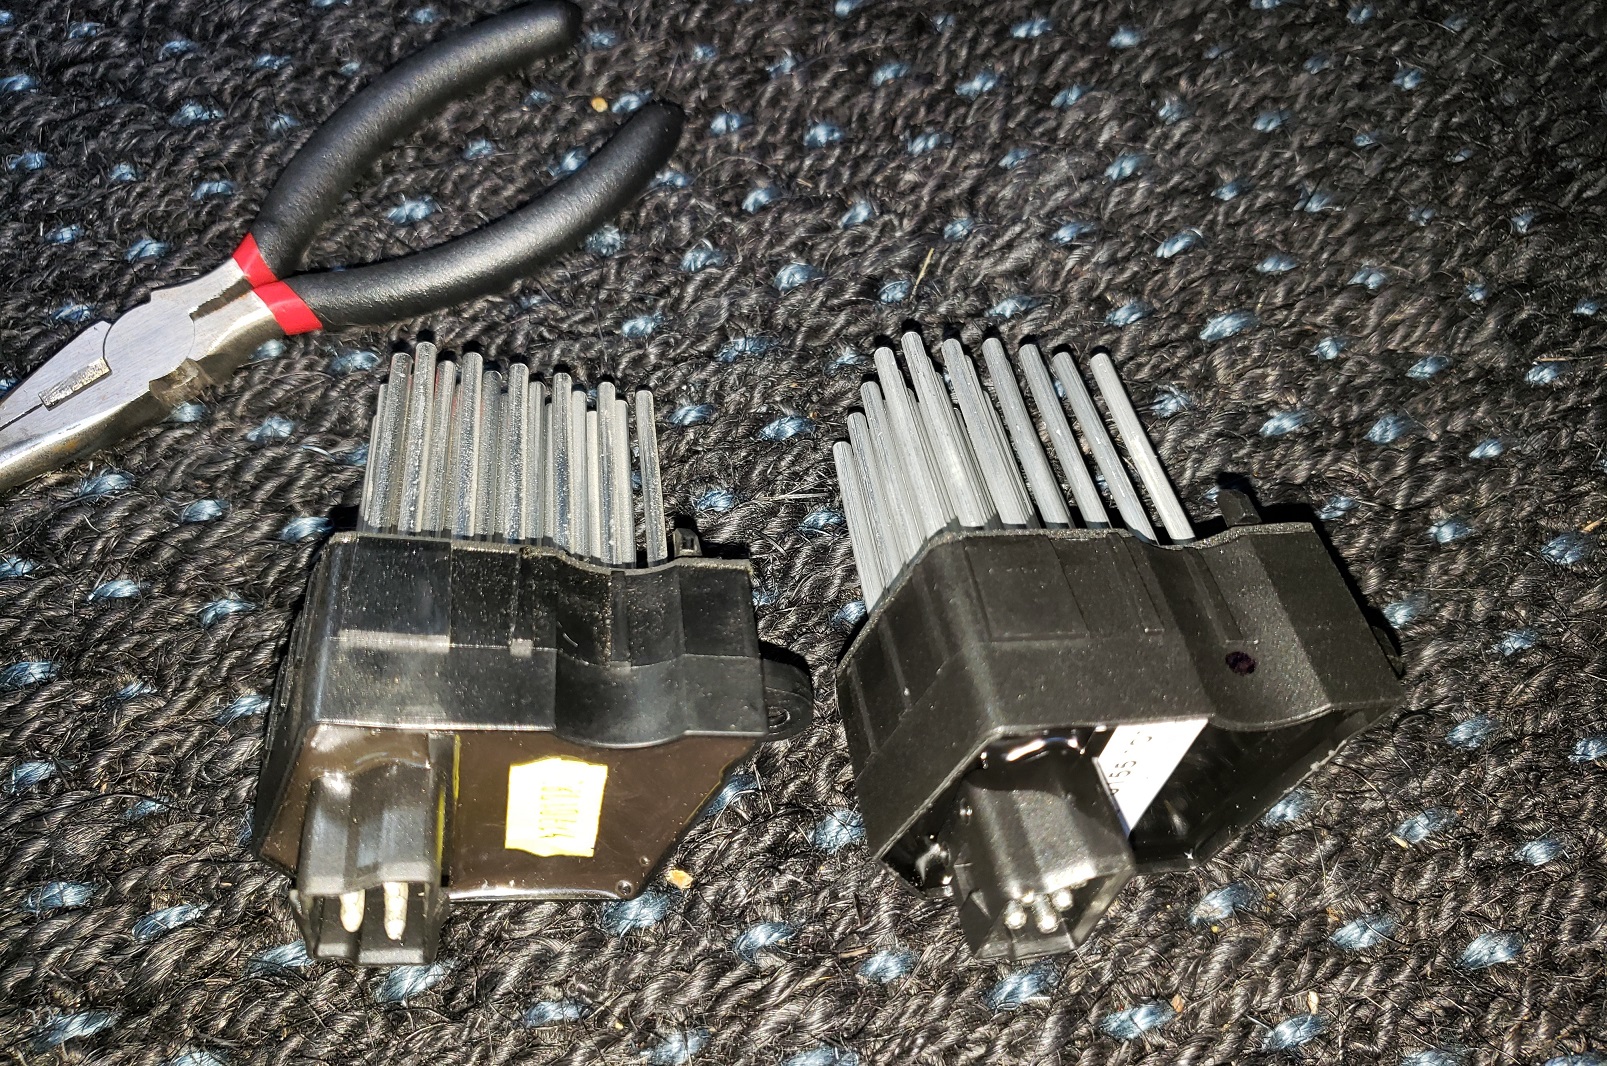
The first issue was the HVAC blower died. No air was coming out no matter what the fan setting. Of course this happened just when it got warm in the greater DMV area so I had to address it quickly. I knew there was a good chance the culprit was the final stage unit, or FSU, that acts as a resistor for the system. It’s a known issue with BMW E39s and had already been replaced before I bought the car in 2011.
The best video I found describing the replacement was not from one of my usual go-to sources. A guy named Ken Latino put an excellent video up on YouTube back in 2012 that does a great job laying out the steps. It’s the only BMW video he ever did. The FSU in his 2003 530i had started to drain the battery, which is another problem these units cause.
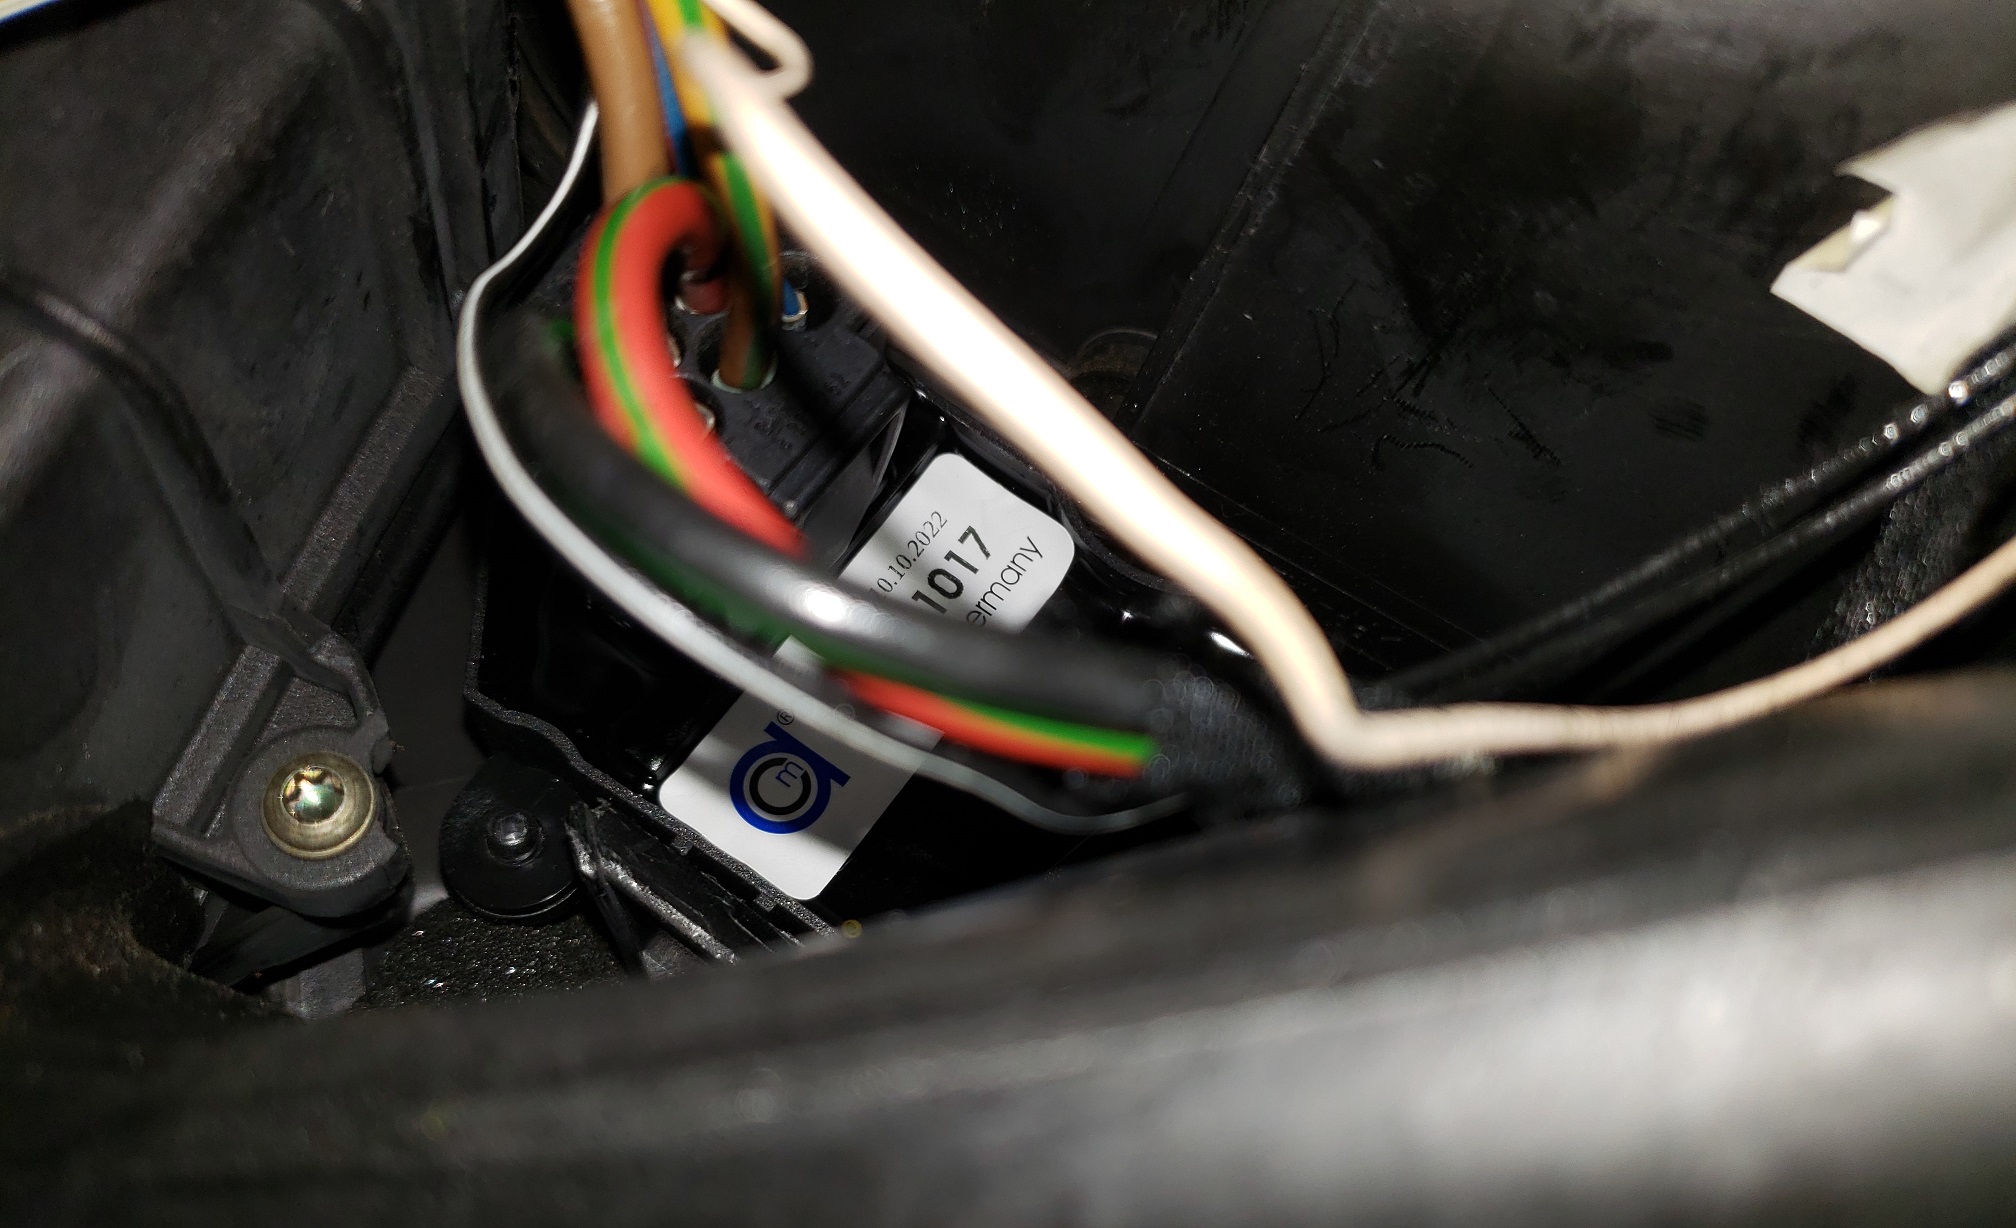
The process was as straightforward as Ken described. It was awkward to get on my back underneath the passenger-side dashboard, but I was able to disconnect and remove the old unit without too much trouble. The fact it had been done before probably helped. I purchased the replacement from trusted source FCP Euro, made by a company called ACM in Germany. It was one-quarter the price of the BMW-branded replacement and original equipment. If and when this one dies FCP has a lifetime replacement guarantee.
I pushed the new one in until I heard the satisfying click and AC was back in operation. This was a big relief because if the problem had been the main blower deep beneath the dash the repair would have been far tougher.
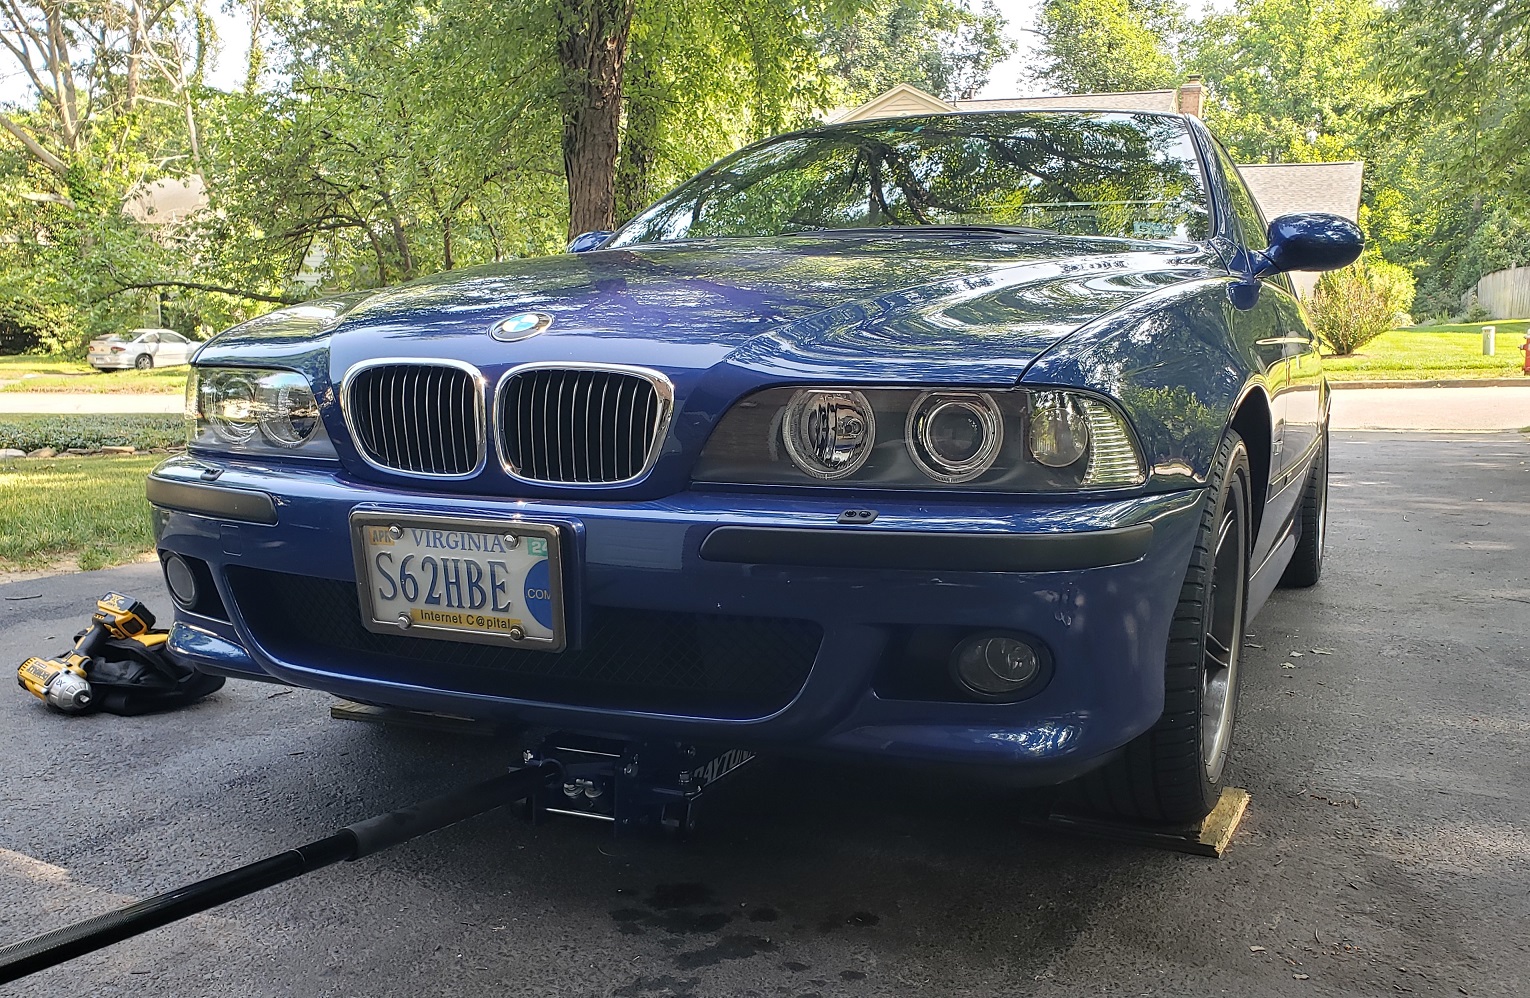
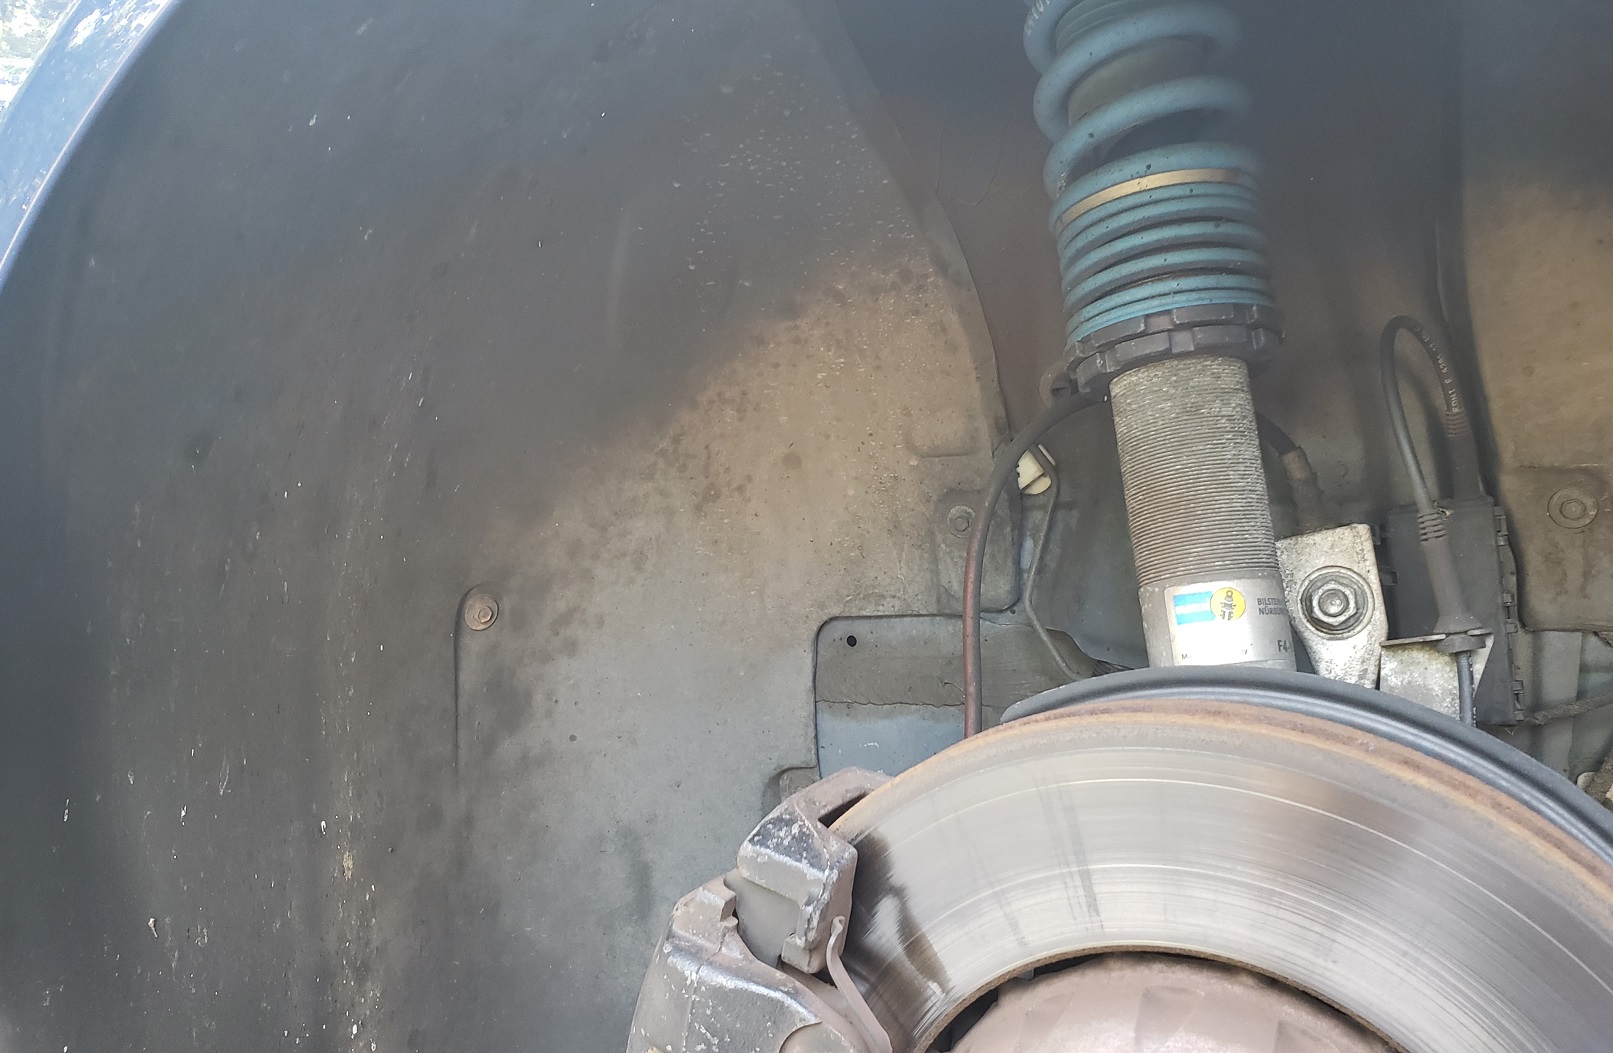
The next issue was a problem with the washer fluid system. I put new fluid in but was getting a center cluster warning for low fluid. The fluid I put in was quickly coming out onto the driveway below the car. I turned to an excellent video from Ryan Schultz’s E39 Source YouTube channel to learn likely leak spots and watch the repair process. It looked doable at home and allowed me to use my new Daytona low-profile jack, which I bought a while back but was still in its box.
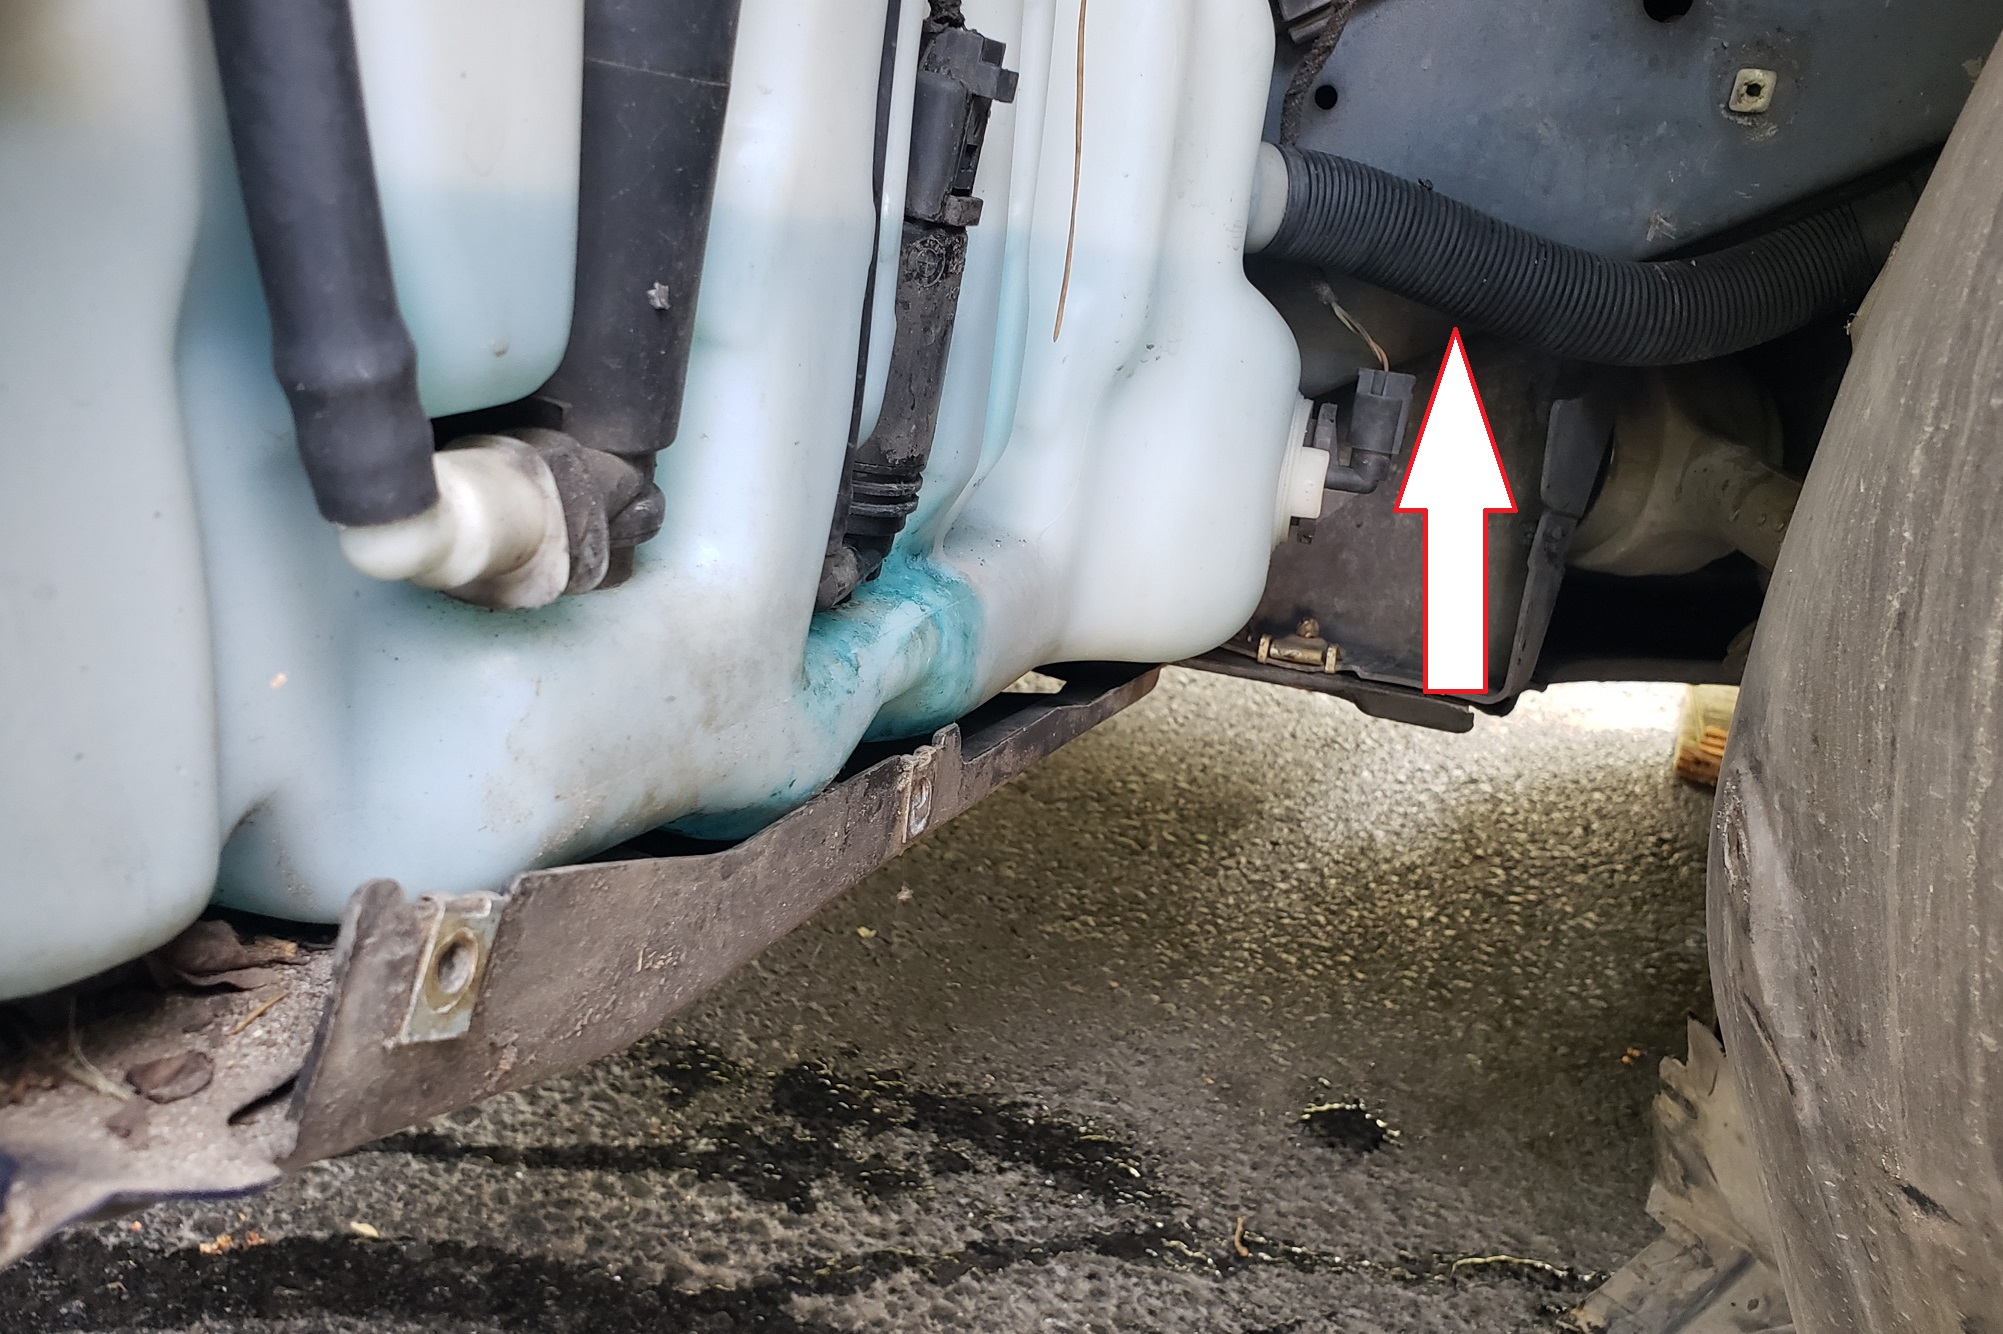
I got the car up on jack stands (note to self, get low-angle ramps) and removed the wheel liner. Unfortunately, then I discovered that my leak wasn’t in an area highlighted by Ryan in his video. I had purchased some grommets and a main pump ahead of time since they weren’t that expensive, hoping to fix the problem right away. But my leak is before the fluid ever reaches the reservoir. That points to the main filler hose as the culprit, higher up in the engine bay before it connects to tank.
At that point I decided on a tactical retreat. I buttoned things back up and will tackle the replacement at a DIY event in July. It will be much easier with the car on a lift rather than on my back in the driveway. The time wasn’t wasted since I got familiar with the process and was able to diagnose the problem. So that’s the “half” referenced in the title.
That’s enough M5 jobs for now. This weekend I’m tackling rear rotors and pads on my M3, which should be a satisfying DIY. I’ll get that post up next week.